If you significantly improve your typing experience, the first step is just to lube switches right away. This will not only improve the smoothness of them, but also remove all the annoying sounds and scratchiness.
This guide is for everyone who is constantly looking at the different techniques for switch lubing as well as for newer enthusiasts just coming into the hobby who are looking for a more up-to-date resource.
I lube and film switches for a lot of different people and have found different methods work better for different switches and constantly find myself speaking with other lube monkeys about the results of different methods, lubes, etc.
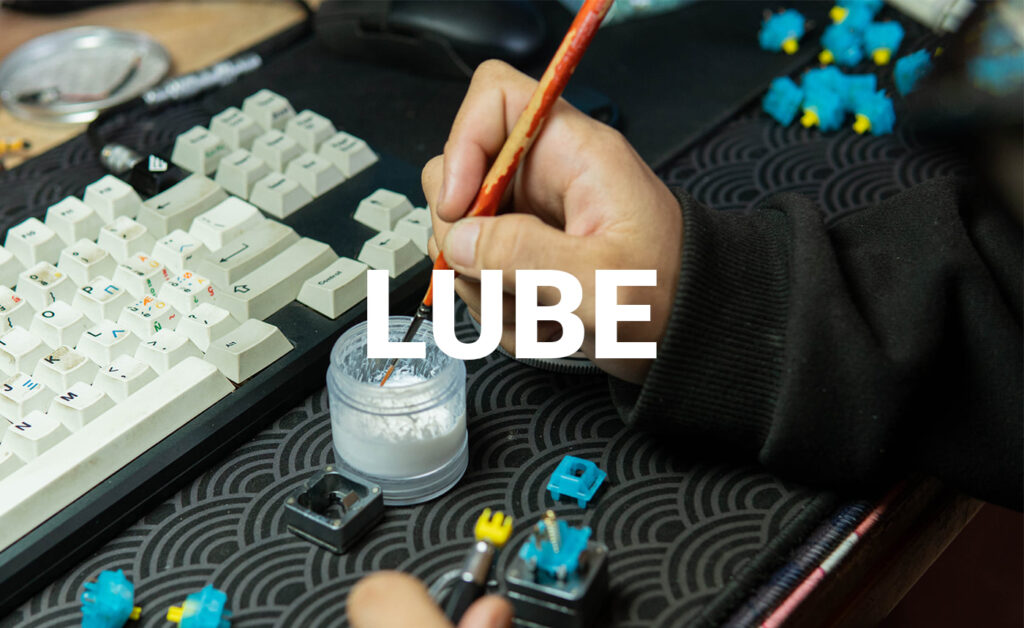
Why should we lube switches manually?
There are 3 reasons to lube switches manually when using mechanical keyboards:
- To mask any scratch from a switch
- To get rid of spring ping or leaf ping
- To deepen/fill out the sound of a switch
This is a great question to ask yourself before you put yourself through the process of sitting down for a few hours to open up, disassemble, lube, and reassemble your switches.
When should we use factory-lubed switches?
As the hobby progresses, we’re seeing better and better switches right out of the bag/box.
Factory lubing tech/methods are getting better, when does it seem okay to just run those switches stock?
Worth is subjective but if you need an answer, if there isn’t spring/leaf ping, there’s a tolerable level of scratch, and the switch doesn’t sound plasticky/thin, it sounds like your switch is fine to run stock.
Be sure your entire batch is consistent though, not just one switch.
How to lube mechanical keyboard switches
How to Lube Switch Springs
This is definitely an odd thing to put as the first section but it really is one of the more universally modded parts across all switches- linear, tactile, and clicky switches alike.
Hell, your stock switch might be almost perfect for the most part aside from that spring ping. So, we’re going to cover three methods for lubing your springs: bag lubing, brush lubing, and donut dipping your springs.
Bag Lubing Your Springs
You’ve got your ziplock bag, at least some type of oil (Krytox 105-107 is what is generally used) and you should have all your springs already harvested from the batch of switches (or if you’re going to spring swap, that too).
You’re ready to lube! This method is great if you’re looking for an easy time and looking to do the job a little faster:
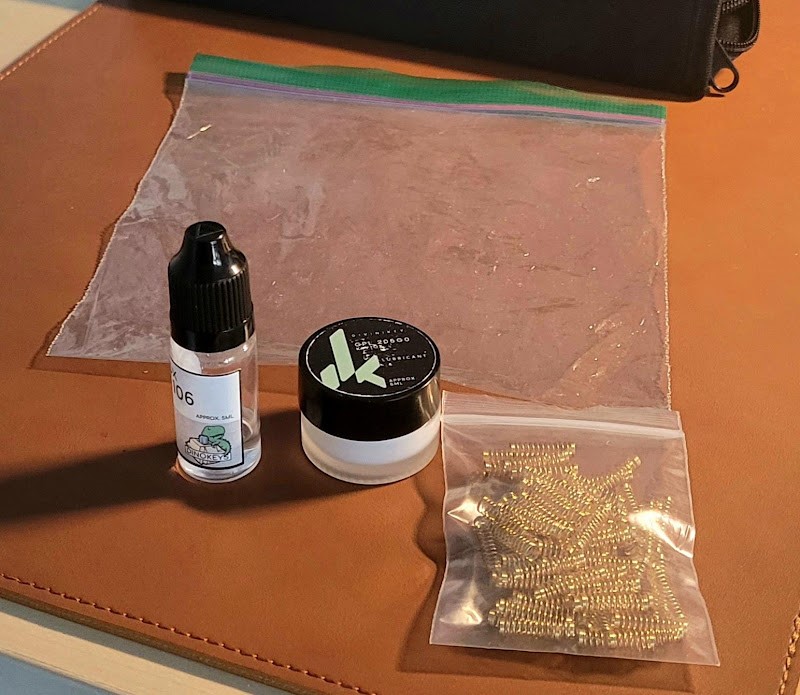
- Throw all the
switchessprings into your baggie - Add in a few drops (5-7 is fine, I do 1 for every 10 to be safe) of your oil
- Optionally, I like to add some 205g0, just a little glob or two applied with a brush to the bag. I find the mix ends up thicker and lasts longer
- Seal the bag but blow in air so that there’s room for the springs to move
- Shake it up for at least 30 seconds and really make sure the switches hit every part of the bag. This is basically spreading the lube all over the springs
- Let the air out of the bag and then lay the bag on the table and massage them for a few seconds. This is going to make sure any globs of lube are spread out evenly and untwist some of the springs
- You’re done! If you look closely, your springs should have a thin sheen.
Brushing Your Springs
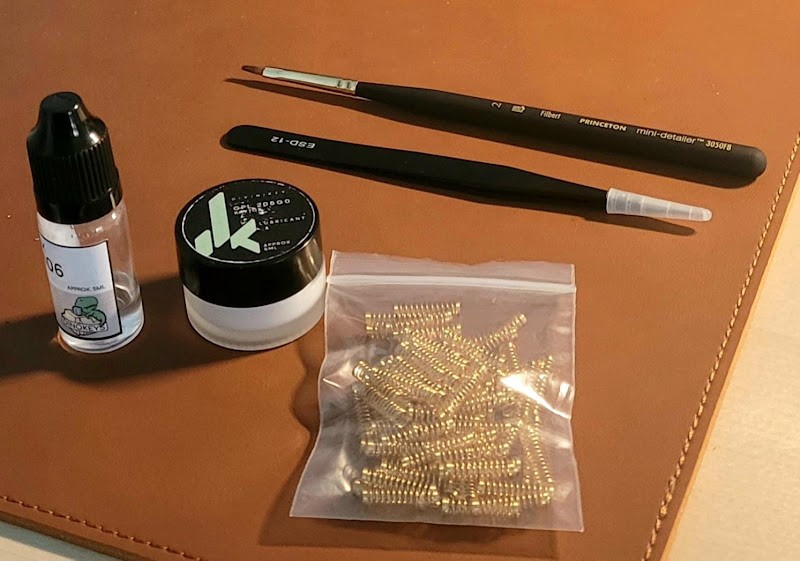
So, you’ve got the same set-up as bag lubing but brushes instead of a bag (and optionally a tweezer to hold the spring). You’re ready to brush lube!
I found that brushing tends to last longer than bag-lubing, and it’s a handy method if you don’t have any thinner oils in-house.
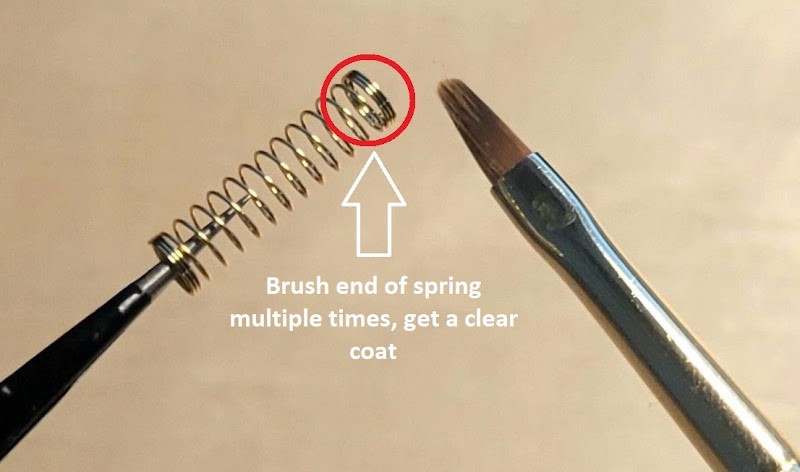
- Get some lube on your brush- you don’t need a glob, just a consistent coat along the bristles of the brush
- Hold up your spring and brush one end. You don’t need to cover the inside, just brush perpendicular to the bottom and along the side of the end should be fine. You’re looking for a transparent but still visible coat of lube along this part in the red circle of the image
- You’re done! You really only need to do one end of the spring. Place the lubed side onto the bottom housing. Rinse and repeat this process for the rest of the springs
Donut Dipping Your Springs
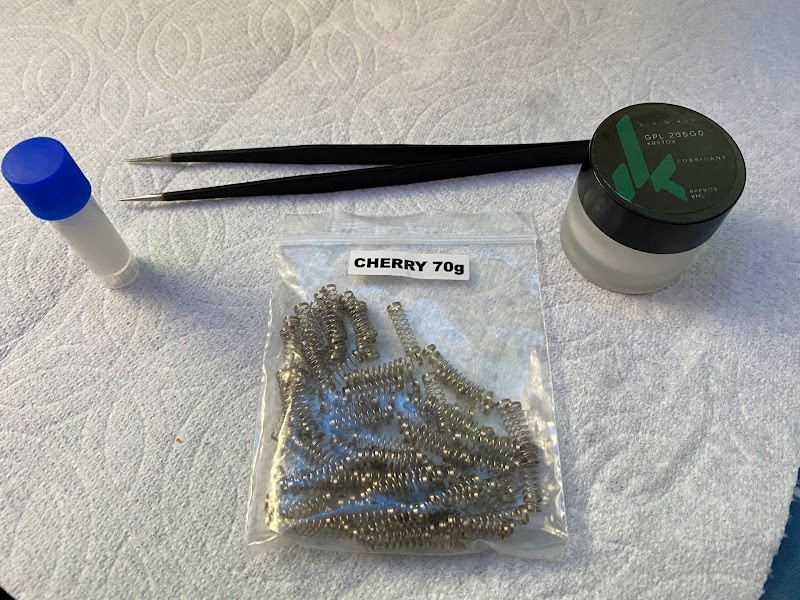
For this method, you’ll need a lube of your choice, probably 205g0.
Donut dipping is not as fast as bag lubing, but if you don’t have thinner oils lying around and feel that brush lube takes up too much time, donut dipping might be for you.
Disclaimer: This can use up a lot of lube very quickly, so if you’re budget conscious, you might just want to brush lube.
- Hold the spring with a tweezer, and insert it into a glob of lube, and a small ring should appear around it. Like brush lubing, this only needs to be done on one side.
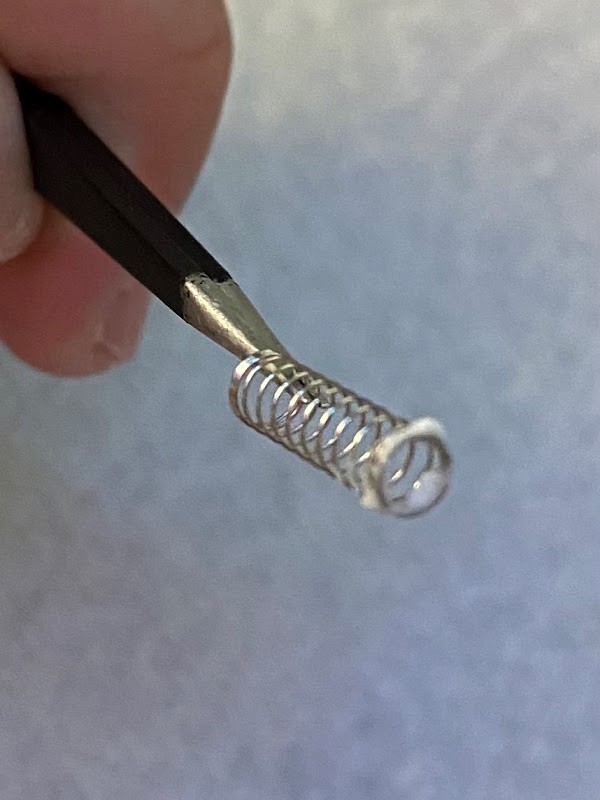
- You’re done! Place the lubed side onto the bottom housing. Rinse and repeat this process for the rest of the springs
Full-Lube-Switch Method
The general idea is that you’re lubing the rails of the bottom housing, the leaf, and the stem of the switch.
When people say they lubed a switch but don’t specify how they did it, this is what I imagine they did for lubing. It’s one of the most commonly used methods and I see a lot of video guides teaching this.
This method will yield the deepest sound results as well but it will take the most amount of time.
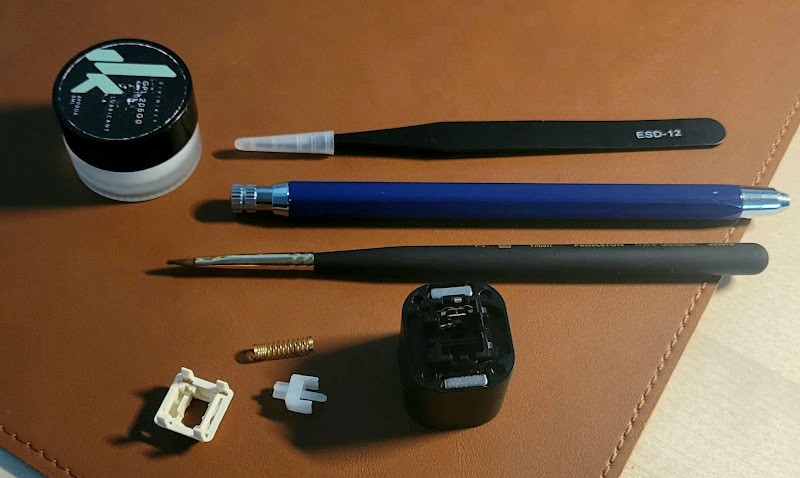
Once you’ve disassembled your switches, grab your lube, brush, and stem holder and you’re ready to go!
- First thing is the bottom housing, you really want to hit 3 spots in this part: The two rails and the leaf. I get lube on my brush tip (No globs, just a clear coat of lube for consistency and to avoid over-lube), Swipe the rails (red circle) twice per side using different sides of the brush and use whatever’s remaining on your brush to swipe across the leaf facing towards the rails(blue circle) twice.
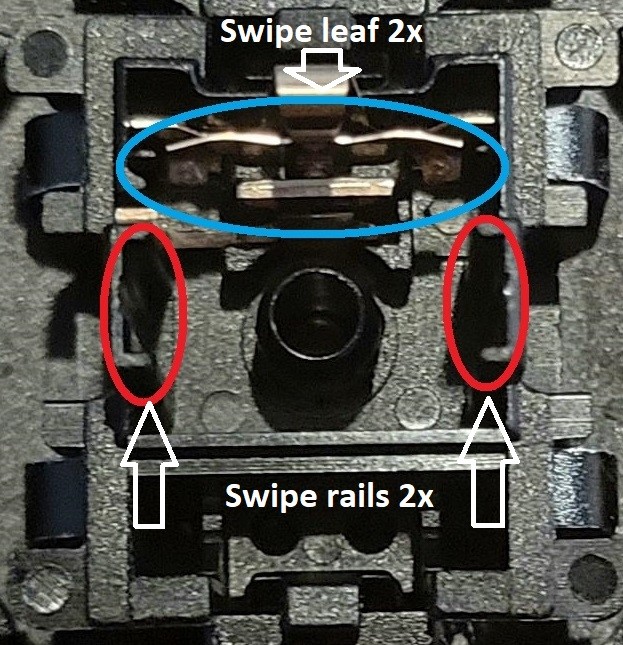
- Next, place your lubed spring (refer to Lubing your Springs section) onto the bottom housing. We’re going to lube the stem next.
- Stem time! First thing, get lube on your brush, same amount as you did for the bottom housing. I swipe horizontally twice across each side of the stem, flipping the brush after the first two sides (Red circle, for every side). This is going to get an even amount of lube across the stem. Next, swipe down on the side with rails, lubing each blue circle twice. After that, I go back and swipe horizontally along the bottom of the backside and again on the legs, once each. That’s it for the stem.
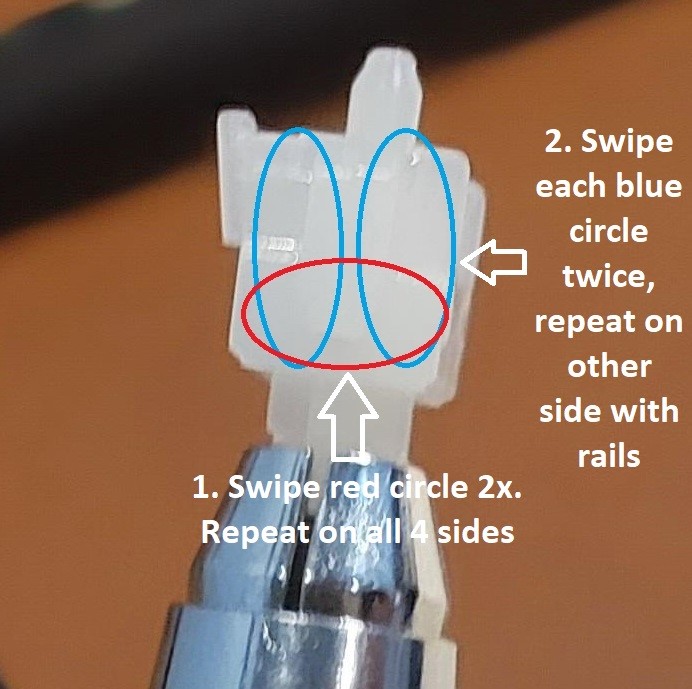
- Place your finished stem on the spring & bottom housing, making sure the legs of the stem are facing the leaf. Take the top housing and close the switch, you’re all done!
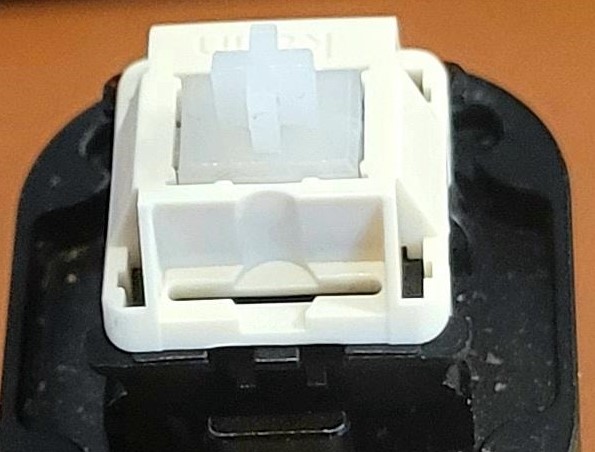
Stem-Only Method
I love doing this lubing method for switches that aren’t too scratchy stock or when I want to maintain a higher pitch switch sound because it takes WAY LESS time to do switches like this.
This works great for JWK switches, SP stars, or any other switches that are already pretty smooth stock.
- Have your lubed spring on the bottom housing, all ready to go. We’re really emphasizing the stem-only with this method.
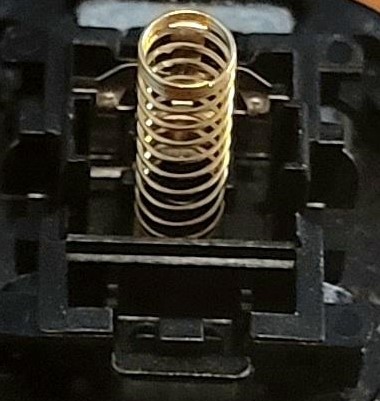
- Hold your stem with a stem-holder and get some lube on your brush. You’re looking for a clear coat, no globs to ensure consistency and to avoid over-lubing. Swipe horizontally twice across each side of the stem, flipping the brush after the first two sides (Red circle, for every side). This is going to get an even amount of lube across the stem. Next, swipe down on the side with rails, lubing each blue circle twice. After that, I go back and swipe horizontally along the bottom of the backside and again on the legs, once each. That’s it for the stem.
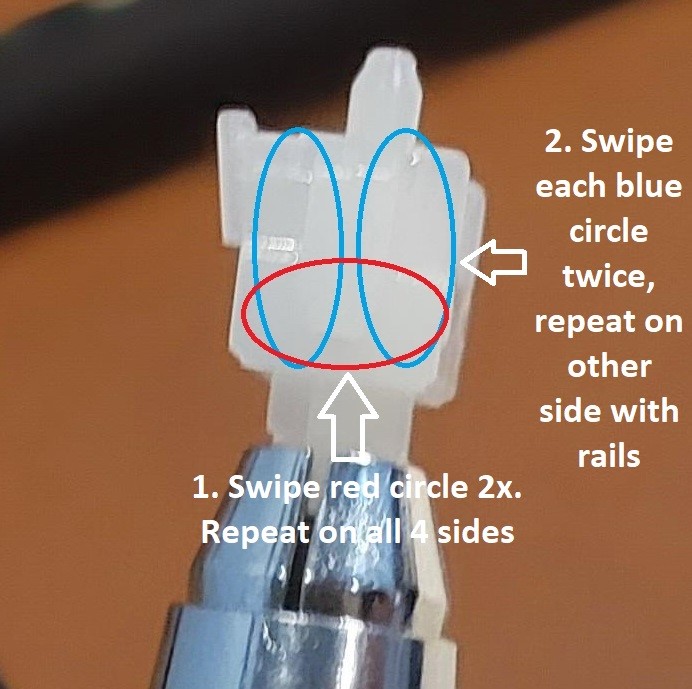
- Take the lubed stem and place it on top of the spring & bottom housing, making sure the stem legs are facing towards the leaf. Take your top housing and close the switch. This is going to go a lot faster than if you had to lube the bottom housing!

Enjoy this filler meme

Different Types of Lube for Switches
Best Lubes for Springs
- Krytox GPL 105
- Krytox GPL 106
- Krytox GPL 107
This is the order from thinnest to thickest for viscosity of oils. Honestly, it’s fine to pick up any of these. Just note that 105 will not last that long compared to 106 or 107 due to its lack of thickness. However, I still use 105 to lube my springs.
Complete List of Switch Lubes
- Krytox 204: Thinner or runnier than 205g0, some people use it for tactiles.
- Krytox 205g0: The “standard” lube that everyone gets and should be available with every vendor. 205g0 can be used to lube linear, tactile and even clickies. It’s an all-arounder lube and with the right amount/technique you can use this lube for almost any switch.
- Krytox 205g00: People mixed up this lube with 205g0 on Amazon. Definitely a thicker lube than 205g0 you can tell by examining it. Recommended to use this to lube creams or mx blacks to mask the scratch.
- Krytox 205g2: I’ve never bought this lube before but some Korean Mech Youtubers use 205g2 mix with 105 to lube their linears. It may be worth experimenting with.
- Krytox GHv4 Thick (106+206g2): Thick lube used for scratchy switches like mx blacks or creams again. Using this lube tends to deepen the switch’s sound a bit due to the thicker consistency. Be careful with this lube if you pick some up, as ghv4 is harder to spread the lube compared to 205g0 and easier to over-lube with. “Less is more”.
- Tribosys 3203: A thinner lube, generally used with tactiles
- Tribosys 3204: Can be used to lube for linear or tactile switches. I would pick this over 3203 as it’s like 205g0- you can use it in different situations. Many switches nowadays are already smooth enough that using 3204 is fine.
- Gazzew Blend #7: Purchasable from Gazzrew himself, this is a thicker lube that many people favor for donut dipping
How to lube tactile switches?
As I mentioned previously, the guide was primarily written with linear switches in mind, but we’ll be covering how to lube tactile switches in this section.
The main difference here is that the stem has a bump.
Many people will tell you to not lube the stem legs or leaf to preserve the tactility/not dampen it. However, as someone who has used many tactiles, I think it’s okay to lube the stem legs if you want to round out/dampen the tactile bump.
Occasionally, a tactile bump might be just a tad sharper than you would otherwise like, but you can round that problem out with leg lubing. Just treat it like lubing a linear switch in that case, one swipe across the legs is fine, I still avoid lubing the leaf facing towards the rail.
You can do full-lube or stem-only, for tactiles, it’s all preference. I’ll now cover where to avoid lubing if you did want to preserve the tactile bump.
Bottom Housing
You can still lube the rails of the bottom housing if you like, but avoid lubing the leaf facing towards the rails, I found that it dampens the tactility too much
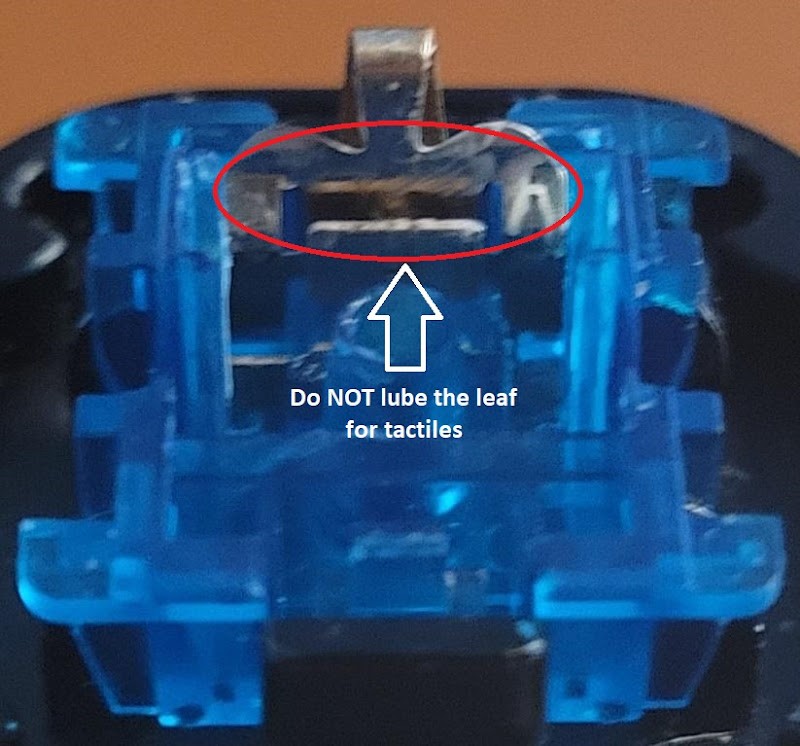
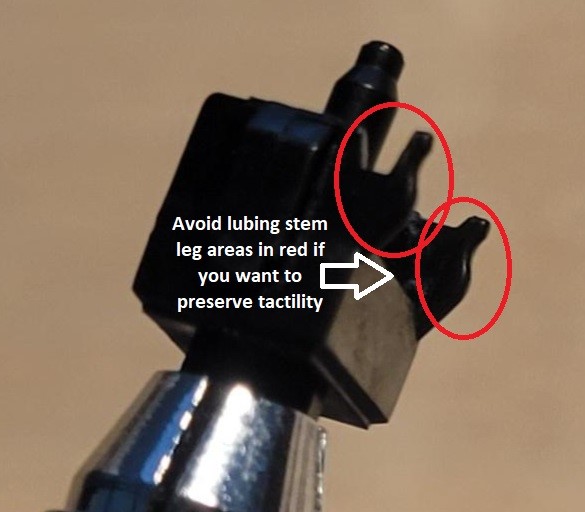
Stem
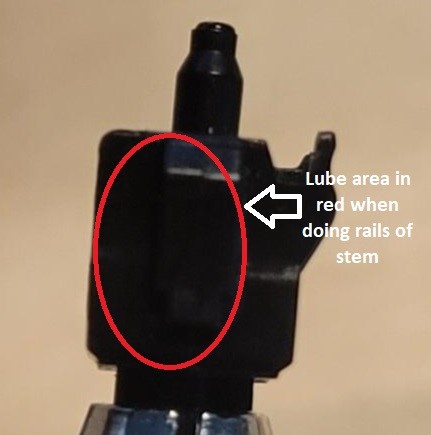
If you want to preserve tactility, avoid lubing the stem legs
Just because you can’t lube the legs doesn’t mean you can still do the rails. You just have to be mindful of where you apply lube since lubing the side could still get the legs
Reducing Leaf Ping
Many switches, tactile or linear, can suffer from leaf ping (some JWKs). But there’s a method to getting rid of it, and it doesn’t involve dampening tactility for tactile switches!
This method has been drifting around for a while now, but I haven’t seen any guides with visuals for it, so I had to experiment myself.
Where do I lube to reduce leaf ping?
You’re going to lube the back of the leaf, the side facing towards the back of the switch and away from the rails. Swipe twice, making sure to go from end to end in the highlighted area.
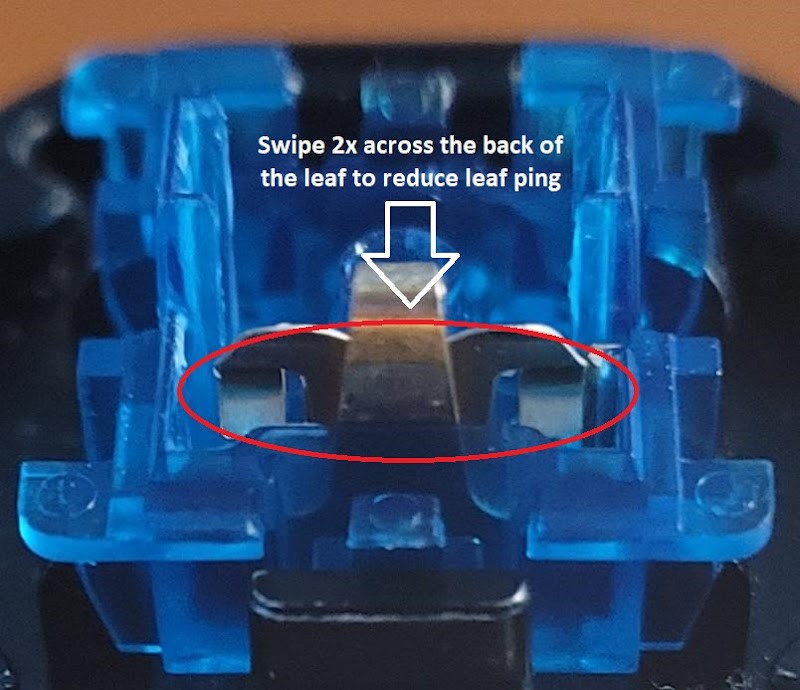
You can use whatever lube you’re using for the switch already, 3203, 3204, etc. but I found the best results with 205g0.
How to Lube Broken-in Switches
With switch break-in machines becoming more and more accessible, coming across broken-in switches is pretty commonplace these days.
Luckily, the method that you use to lube a broken-in switch is more or less the same as any other stock switch. You could do the full-lube method or stem-only, depending on how smooth your switch is or what type of sound you want to go for.
However, the one thing you should note is that when you lube broken in switches is that you need to keep the housings/stem together.
Unlike regular switches, you can’t mix and match the housing and stems, this is because the switches wore in such a way that the parts are a perfect fit for each other. Mixing parts would mitigate a lot of the benefits of breaking in switches.
Most people recommend opening, lubing, and closing each switch, one by one, to avoid mixing anything up.
Personally, I open a small batch of switches, keeping all the parts together, lube them all, and then close them all, in an assembly line fashion.
Whatever works for you, go for it because as long as you keep the parts together, you’re Gucci.
How to clean off factory lube on switches
We’ve already discussed when you should just run factory-lube/oiled switches but let’s discuss when you shouldn’t run them.
If you’re having doubts about the factory job of your switches even after it passes the sound test (no spring ping, no leaf crunch, not thin/plasticky sounding), take one of them and open it up.
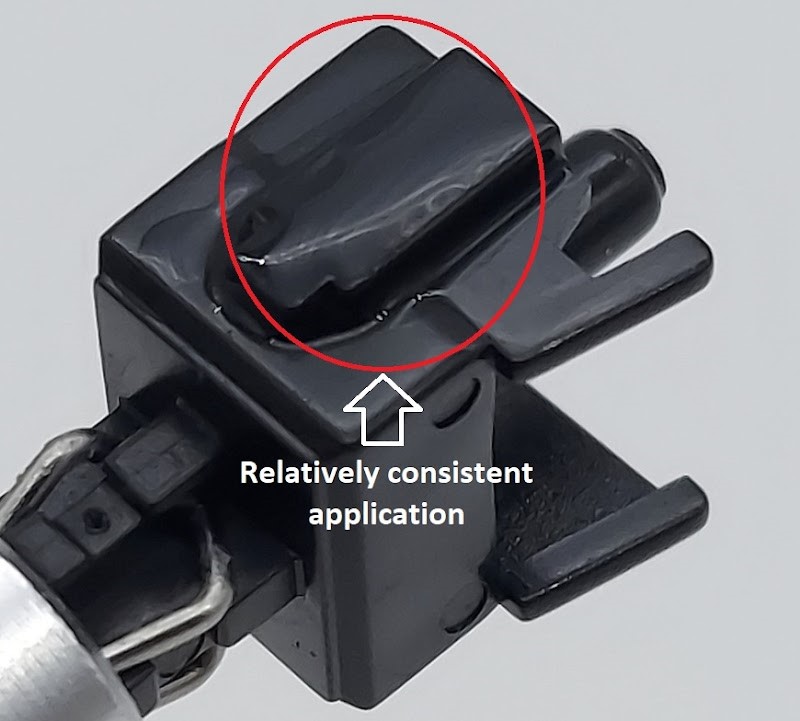
What you’re looking for is a relatively consistent application and no globs of lube
Now what looks like a bad factory job?
Well, if there’s any white globs of lube on the stem, that should already tell you that the job is going to be inconsistent throughout the batch.
An example of such is when you noticed that a good number of your switches has issues/visibly have more lube than other switches throughout the batch.
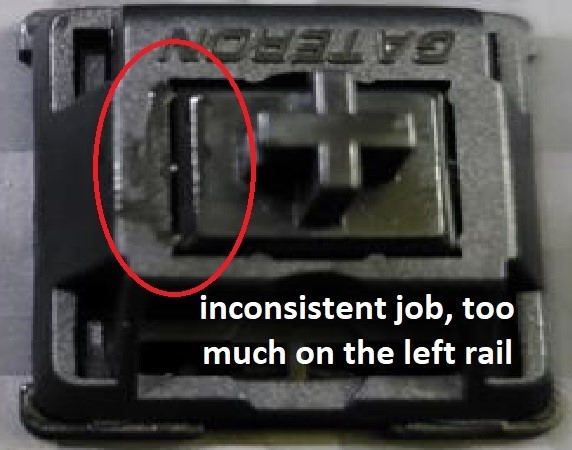
How do I clean the pre-lube?
That’ll depend on how thorough you want to be.
The most thorough way is to take a q-tip/cotton swab and isopropyl alcohol and wipe all the lube off the bottom housing and stem.
However, I found it easiest to take a clean rag/towel, wipe off the lube/oil on the stem and call it a day. The majority of factory lube is usually on the stem anyhow.
Some people also use ultrasonic cleaners on the stems and let them air-dry over the day, but this doesn’t work 100% of the time.
Do I have to clean the factory lube?
Nope! If you find that the factory lube is consistent enough or little in amount, you can lube right over it instead of cleaning it off.
Just be sure to go extra light on the 205g0, or even use a thinner lube if you intend to do this.
Your main goal is to spread the factory lube and get an even layer across the stem.
Conclusion
We believe that after reading this guide, you are now very confident whenever you need to lube your switches. Just follow our tips and you will be golden.
Just take a not that there are some ways to lube your springs. While the bag lubing is the easiest one and only takes you a few minutes to get it done, lubing with brushes is always the best and helps your lube last a lot longer. If you like changing switches once in a while, using a ziplock bag is totally fine!
And if your switches are already pre-lubed, but you still want it to be more a lot better, over-write the factory lube is totally fine If you don’t have time.
Thanks for tuning into the guide, I hoped you found it informational. It will be continually updated & revised as we grow along with the hobby.
If you require supplemental information about lubing switches or just keyboards, feel free to join the Andy Teaches Teach server where we hang out and shoot your question under #keeb-help.
Guide by kobb#0001.

Thanks, I will be referring to this guide when my Tribosys 3204 arrives to lube my Gateron optical browns. I have ordered some TX films too. I have used mechanical keyboards for a good few years now but this is my first time taking switches apart and lubing them