Lubing your switches has become a standard mod among mechanical keyboard users, as it improves both smoothness and sound.
But what happens if you need to clear lube to do another one? Whether it is a previous lubing work or a factory-lubed switch?
Let’s look at why and how you should remove the pre-lube on your switches.
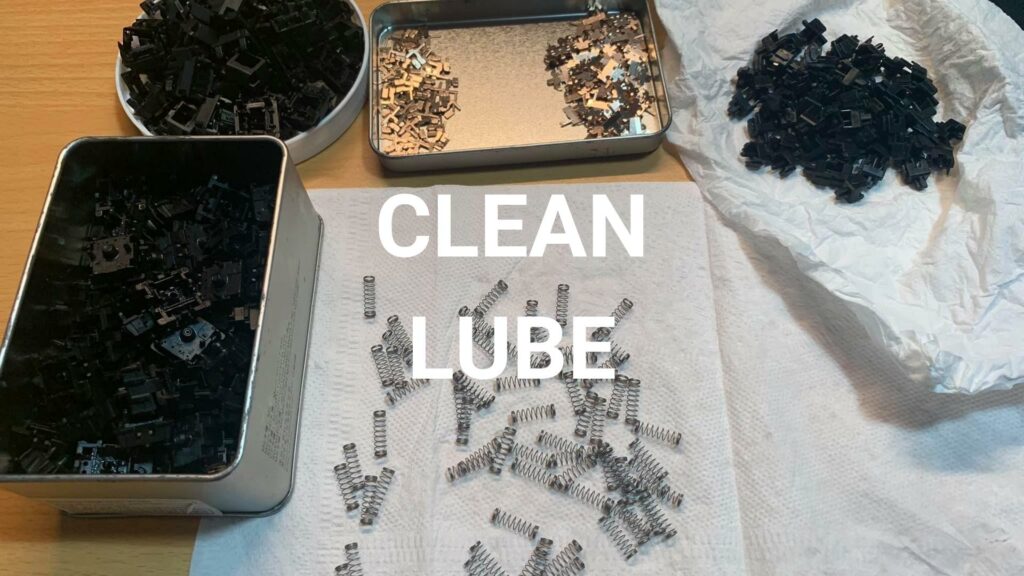
Required tools for cleaning lube on switches
- Switch Opener
- Lube Station (Must Have)
- Towels (Paper / Cloth / Microfiber)
Method 1: Alcohol Swabs
- Plastic Bag or Container
- Isopropyl Alcohol 70% minimum
- Q-Tips
- Salt (Optional)
Method 2: Soap and Water
- Hot or Warm Water
- Bowl or Strainer
- Soap
- Brush (Toothbrush is okay)
Method 3: Ultrasonic Cleaner
- Ultrasonic Cleaner
- Distilled Water
- Dishwashing Liquid
How to clear lube on switches
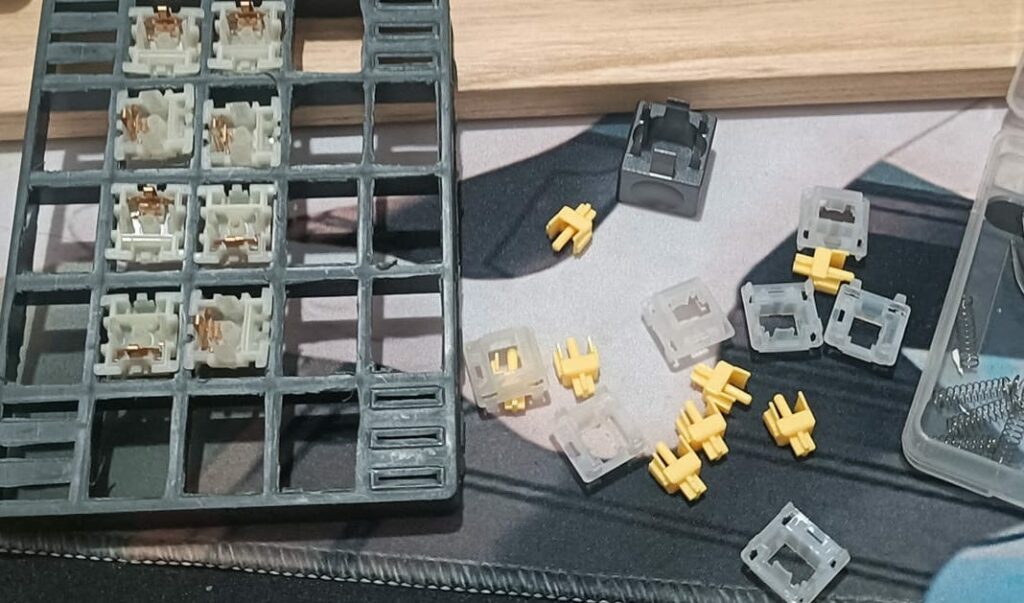
Step 0: Disassemble your Switches
Obviously, washing your switch while it’s still assembled won’t be ideal.
To totally clean lube work and make your switches as fresh as possible, you must first open them up and unpack them into their component pieces.
Two tabs on both sides of the Cherry-MX style housing must be pried apart to access the two parts of the switch housing.
You could pry those tabs away with a small flathead screwdriver or with a pair of tweezers (2 by 2).
The Kailh Box and Outemu switches, on the other hand, are a little trickier, as those two tabs are encircled by a big ring tab.
This ring tab makes opening a box housing a little more difficult, although it may also be done quickly with an opener.
All in all, using a switch opener is a lot easier and faster, which is recommended.
Split and arrange your switch components once your housing is open.
Top housing, bottom housing, stem, and spring should be divided into four groups.
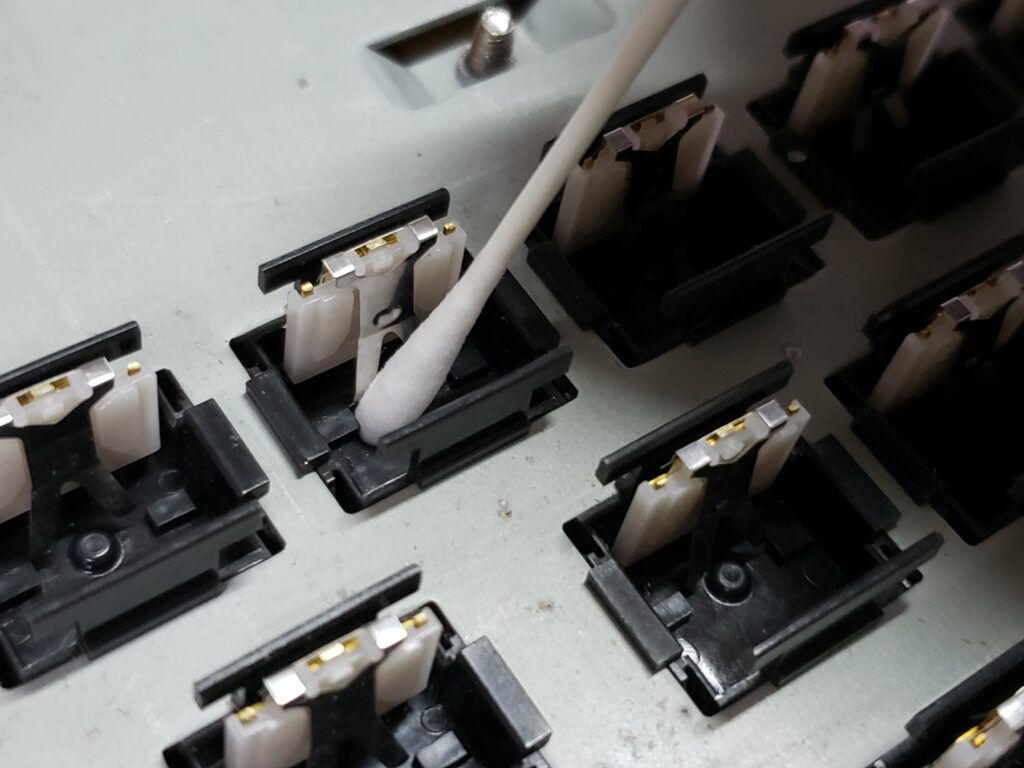
Method 1: Using Alcohol Swabs
The first method for removing all lube from our switch parts is using alcohol.
Even while some lubes, such as Krytox, are unaffected by even strong solvents, it will be far more effective than just wiping down or cleaning switches.
Always be wary of using a lot and for too long of a strong alcohol, as it will quickly dry up and stain your plastic parts.
While alcohol might affect differently to different plastics of housing components, it is better to avoid putting your switches in alcohol for a long period of time.
Step 1: Clean up any excess lubricant
Even if we’re using a strong liquid like alcohol, we still need to wipe out the extra lube using a clean q-tip, or towel, depending on the component.
This will help because the alcohol will be able to focus right on the surface.
Step 2: Soak a Q-Tip in alcohol.
To squeeze out extra alcohol, dip the cotton swab into the alcohol and push it against the container’s edge.
To avoid damaging the entire bottle, it’s better to keep your alcohol in a little dish or cap.
The q-tip must be saturated but not soaking wet with alcohol. Now we’ll go over each switch component individually.
Step 3: Remove Lube from the Bottom Housing
The bottom housing is the most difficult to clean, as it will include both a plastic housing and a metal leaf, usually made of bronze.
If you’re not careful, the leaf can be quite thin and fragile, and any damage to the shape or contacts will result in a poor switch.
With the alcohol-soaked q-tip, clean or wipe the walls, floor, and stem tube.
Remove part of the cotton from your q-tip or use a paper towel if it’s too big.
This process may need to be repeated a few times or you can try with a cotton swab.
Step 04: Remove Lube from the Top Housing
As we progress down the list, it becomes easier.
Because the top housing is entirely made of plastic, you don’t have to be concerned about damaging any copper pieces that are critical to the switch’s operation.
Simply soak a q-tip in alcohol and wipe off all surfaces.
Step 05: Remove Lube From The Stem
To remove any lube from the stems, we can use a towel or microfiber instead of a q-tip.
To remove excess, start with a dry towel and then a towel soaked in alcohol.
If you want to be more careful, a q-tip can be used instead, as well as around the stem legs.
If any of the stem legs are broken off, the switch may not work properly.
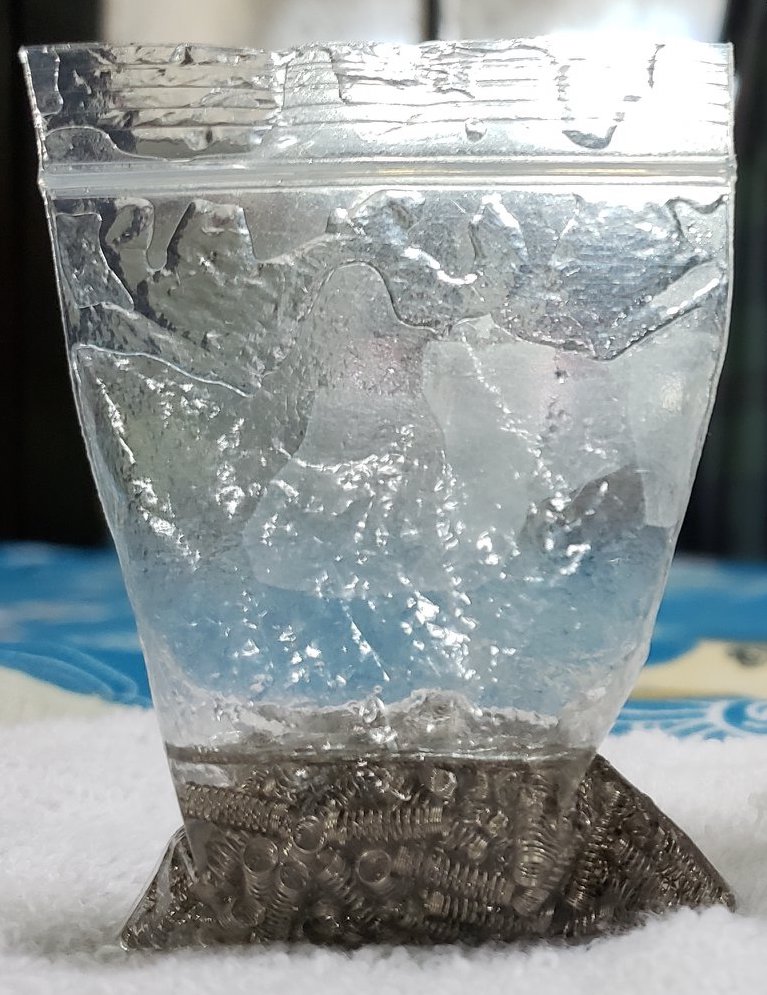
Step 06: Soak the springs in alcohol (Reverse Bag Lube)
For the sake of time and convenience, many people like to lube their springs in a bag, therefore we’ll use the same method to remove the lube.
Simply place your springs in a container, such as a plastic ziplock bag or a plastic bowl with cover, and fill with alcohol.
By shaking the bag or container, you can soak the springs them totally.
Instead of heavier oil or grease like Krytox 105 or 205g0, springs can be factory lubed with a PTFE oil like Superlube PTFE oil.
If your springs are lubed with a thick lubricant like 205g0, this procedure may be more challenging.
If your switches have clickbars, you can clean them using any of the ways listed above.
Step 07: Air Dry
Allow all of your switch components to dry naturally.
Because alcohol evaporates very fast, this process should be quicker than if water were used.
Even the wetest switches should dry in less than 10 minutes, but you can leave them to dry for as long as you choose.
Optional Step: Salt and Alcohol
If your switch parts, particularly the springs, still have oil on them, you may want to add a special element to your bag-unlubing recipe: salt.
Sometimes all you need is a pinch of salt, just like in a delicious dish.
Salt is an excellent choice because it does not dissolve as quickly in alcohol as it does in water.
You can take use of this by using it as an abrasive element to brush your switch parts while shaking them in alcohol.
Simply shake up your bag with a spoon or two of salt (or more).
When applying this to your stems and housings, be careful because the salt may roughen the smoothness of the plastic.
You may need to give the springs one last clean wash to remove any salt that has remained.
Method 2: Water and Soap
If you want to avoid using alcohol on anything besides your springs, you can use soap, warm water, and a brush instead.
This technique should not be used on bottom housings unless you are very careful and give plenty of time for them to dry.
Step 1: Clean your stems
Put the stems in a strainer, then place the strainer in the bowl, and fill the bowl halfway with soap and water. Make sure your strainer and bowl are large enough to fit it.
You don’t want to pour the bowl all the way up to the top because your stems can float away.
Stir the stems in the soapy water with your fingers. Scrub the oil away using the brush.
Keep in mind you can get some suds and foam, as this will aid in the removal of any remaining oil or grease on the surface.
Step 2: Clean the Bottom Housings
Repeat the previous process for the bottom housing.
Step 3: Clean the top housings
With top housings, this could be dangerous, particularly with a toothbrush and so much water, therefore it’s probably best to avoid washing your top housings and instead use the alcohol approach.
Step 4: Clean the Springs
If you play with springs too much in a soapy water bath, they will stretch out or twist, thus the alcohol bag-unlubing approach indicated above may be the best option.
Step 5: Allow it to dry
Allow the various parts to air dry after wiping away as much water as possible.
Because of the water on the leaf, if you chose to wash your bottom housings, the drying process may take longer.
It’s best to wait a little longer to ensure these are totally dry before reassembling them.
Method 3: Ultrasonic Cleaner
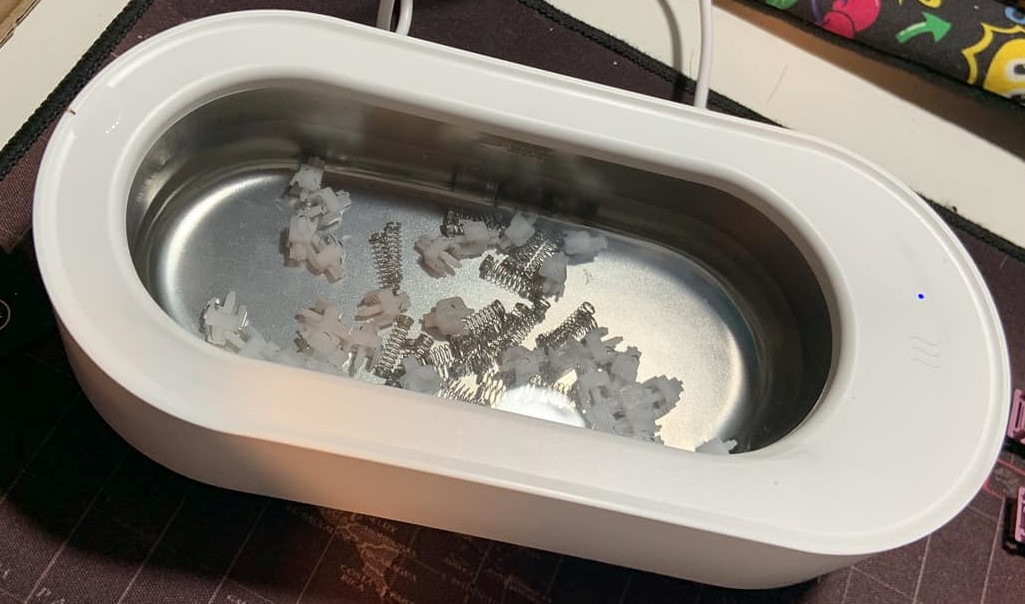
This method may appear unrealistic at first, but if you have access to a tiny and cheap ultrasonic cleaning machine, it may be the most effective and convenient of all the options.
Ultrasonic cleaners utilize sonic waves to pulsate and clean any item submerged in their tanks, thus they could be quite useful for you as well.
Step 1: Fill the container halfway with water and liquid soap.
Ultrasonic cleaners usually need a ph-balanced solution to clean your things, so distilled water is a popular option. Some people recommend adding a little dishwashing detergent to aid with surface tension and oils, which is a good idea in this case.
Step 2: Dip the Housing Parts
A plastic or metal basket is usually included with ultrasonic cleaners to keep the items being washed covered. Because your stems and springs may be too small to fit through these holes, you may need to trap them using a small mesh bag or wire mesh.
Step 3: Use the Cleaner
Run the cleaner according to the manufacturer’s directions. There could be a number of pre-programmed timed options to pick from.
Step 4: Allow to dry
It’s time to wait and let your switches dry out.
Finally, Reassemble Switches
Reassemble is the final step. Switches are components of a mechanical keyboard.
Before using your switches, they must be reassembled after they have dried.
Before putting the switch back together, make sure the stem legs face the copper leaf and the upper housing is in the right direction.
You risk harming or ruining your switch if your components are reassembled in the wrong direction.
Why I should clean lube on switches?
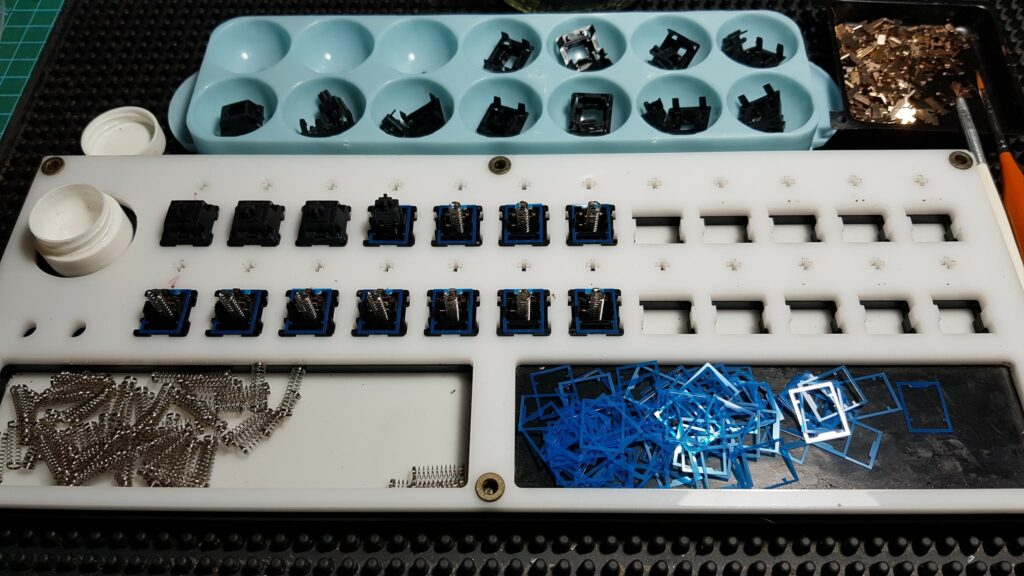
There are a few reasons why you should clean and remove all lube your switches.
The switches you received came pre-lubed from the manufacturer with an unknown or unsuitable lubricant, and you want to remove it to apply your own.
You want to relube the switch with a different product, or you just want to start over because of a bad lube job.
Because the lube that was placed before spread to the stem legs and the leaf of a tactile switch, impacting tactility, you desire a dry switch or stem.
Is it necessary for me to be that advanced when cleaning lube?
You don’t have to remove everything if you’re just going to relube your switches with the same lube or oil.
A basic wipe will suffice to provide a cleaner starting point.
If you’re going to use a different lube, it’s best to remove as much of the old lube as possible from the switches.
It’s essential to be careful of lube on a tactile switch’s stem legs or leaves, as this can lessen the overall tactile sense.
Avoid These Lube Cleaning Mistakes
Don’t go crazy. Some lubricants, such as thicker Krytox 105g0, 205g0, and 205g2, are just too inert to work effectively with some procedures.
If you don’t want to have a terrible experience, don’t remove the copper leaf.
If you wash your switches in alcohol for too long, they can discolor. Because the alcohol destroys any transparent layer from the plastic and fades it out, this happens.
Conclusion
Applying lube on switches can be a joy, but if you’re not careful, it can also be a nightmare.
If you ever find yourself in a scenario where you need to clean the lube from your switches, we hope this article will help you figure out what you need to do.
